
Is this article for you? It covers services only available to Give Lively member nonprofits.
Is this article for you? It covers Salesforce integration services only available to Give Lively member nonprofits.
Access the included reports in Give Lively's Salesforce App
Learn about the collection of reports and dashboard that give additional insight into donations and donors processed through Give Lively’s fundraising platform.
Before you get started
Video Overview
Walkthrough
Before you get started
Video Overview
Walkthrough
Before you get started
Video Overview
Walkthrough
Before You Get Started
Before proceeding, make sure you have completed the steps to install and configure the Give Lively for Salesforce app.
Video Overview
Video Transcript
Walkthrough
Reports and Dashboard
Give Lively’s free Salesforce app includes a collection of reports and a dashboard to give additional insight into donations and donors processed through Give Lively’s fundraising platform. The dashboard and reports both work with or without Salesforce Nonprofit Success Pack (NPSP).
Reports
Note that all reports can be cloned or edited.
- Give Lively Opportunities
- Give Lively Donors
- Give Lively Donations by Text Code
- Give Lively Donations Per Account
- Give Lively Old Open Recurring Donations
- GL Opps and Ticket Purchases by Campaign
- Give Lively Recurring Donors
- Give Lively Opportunities by Campaign
Dashboard
- Most Recent Give Lively Donations
- Give Lively Donations by Fiscal Period
- Give Lively Opportunities by Campaign
- Give Lively Donors
- Opp and Ticket Purchases by Campaign
- Give Lively Donations by Text Code
How to view reports
- Navigate to “All Folders”
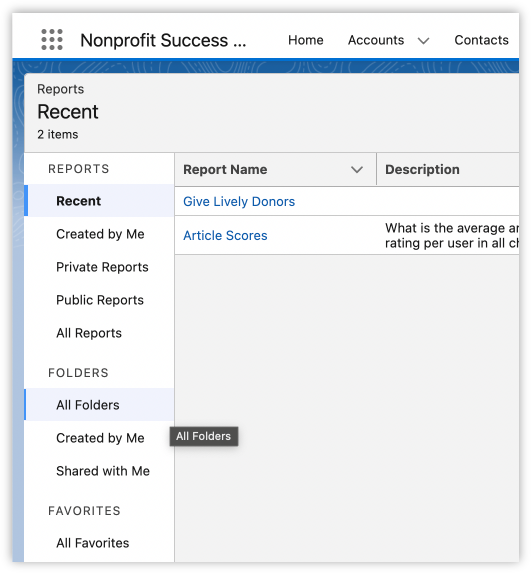
- Click on the “Give Lively Reports” folder
- You will see a list of the new reports
How to clone or edit Give Lively reports
- For more information on building and editing Salesforce reports and dashboards, try this: https://trailhead.salesforce.com/content/learn/modules/lex_implementation_reports_dashboards
How to share access to reports
Non-admins may not automatically have access to newly available reports. Follow these instructions to grant access to your users:
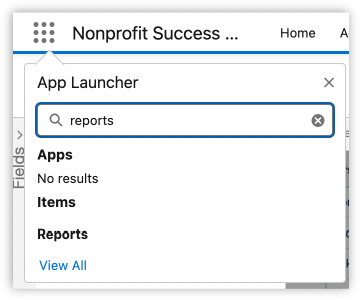
- Search “reports” in the Salesforce App Launcher
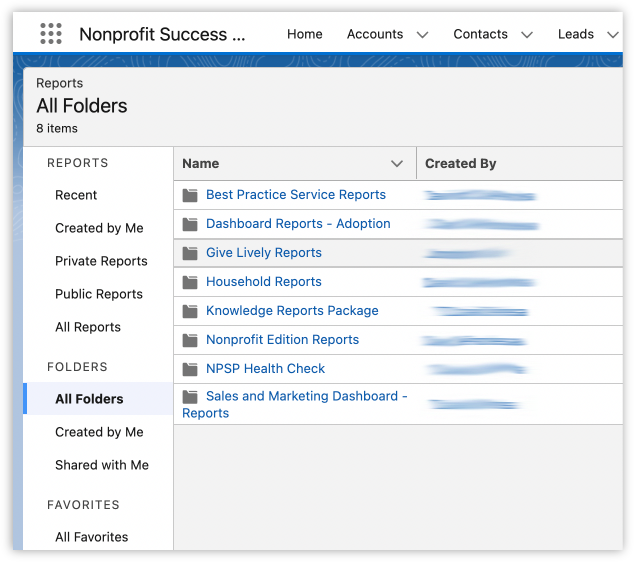
- Navigate to “All Folders”
- Look for “Give Lively Reports”
- Click the corresponding dropdown arrow and then “Share”
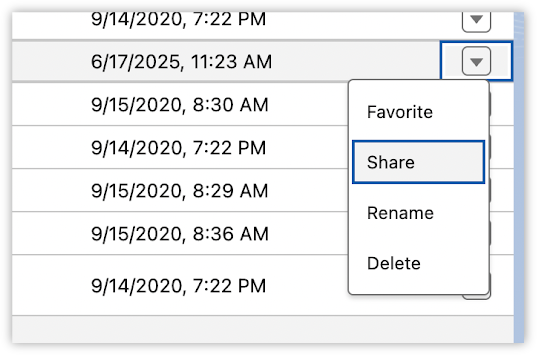
- From the Share menu, add any Roles, Public Groups, or Users who need to access these reports.
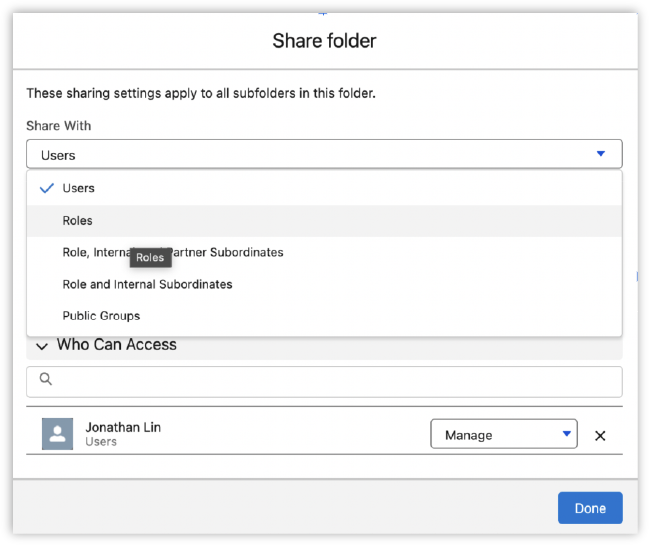
- Repeat steps as needed for Dashboard access
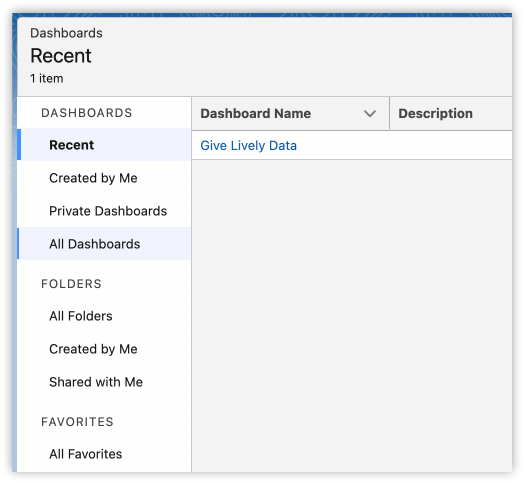
How to access the dashboard
- Search for “dashboards” in the Salesforce App Launcher
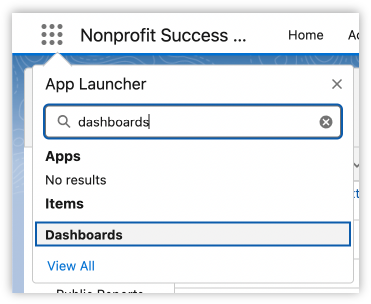
- Click on “Dashboards”
- Navigate to “All Dashboards”
- Search for “give lively”
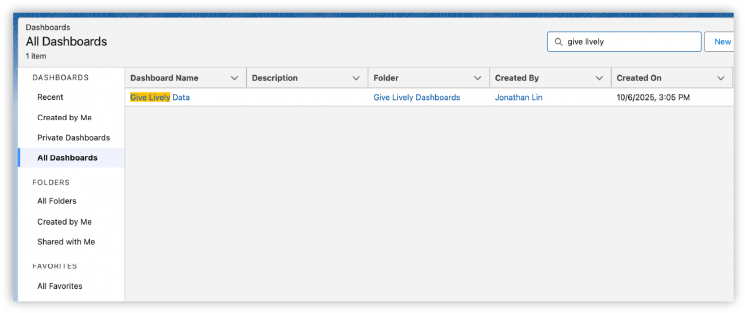
- Click to view the new dashboard
Downloads
Get Inspired
No items found.
RELATED ARTICLES
